Quickstart
Build your first automation in 5 minutes.
1. Create an Account
Sign up at app.oaiz.io using your email.
You'll need to verify your email address before you can log in—check your inbox for the verification link.
Once verified, you'll land on the Canvas view after logging in.
2. Connect Gmail
Go to Settings → Integrations to see your connected integrations and add new ones.
Click to enlarge
- Click Create Integration
- Select Gmail from the provider dropdown and give it a name
Click to enlarge
- Click Connect with Gmail and sign in with your Google account
- Grant OAIZ permission to read and send emails on your behalf
Once connected, you'll see Gmail appear in your connected integrations list.
3. Ingest Your First Event
OAIZ is an event-driven system. Everything starts with an event—a piece of data that triggers your automations. Events flow into OAIZ from three sources:
- Integrations — Connected services like Gmail, Slack, and GitHub automatically push events when things happen (new email, message posted, issue created)
- Custom APIs — Send events directly via webhook or the OAIZ API for custom triggers
- Jobs — Your automations can output events back into the event stream, triggering other jobs or chains
To trigger your first event, send a test email to the Gmail account you just connected (or wait for an email to arrive naturally). Check the Events view to see it appear.
Click to enlarge
Each event has a type (like e:gmail/email-received) and properties containing the event data. Here's what a Gmail event looks like:
{
  "body": "Hi! I want to sign up to your service...",
  "date": "2025-01-15T14:39:51Z",
  "from": {
    "address": "customer@example.com",
    "display_name": "Jane Smith"
  },
  "history_id": "4627",
  "id": "19a78826962bac81",
  "labels": ["UNREAD", "IMPORTANT", "INBOX"],
  "subject": "Question about pricing",
  "thread_id": "19a78826962bac81",
  "to": [
    { "address": "you@gmail.com" }
  ]
}
Show full event metadata
{
  "uuid": "019a7882-6962-bac8-1000-000000000001",
  "organisationUuid": "019a7812-f9ff-7a59-94fd-18d23475ee09",
  "eventTypeIdentifier": "e:gmail/email-received",
  "timestamp": "2025-01-15T14:39:51Z",
  "properties": {
    "body": "Hi! I want to sign up to your service...",
    "date": "2025-01-15T14:39:51Z",
    "from": {
      "address": "customer@example.com",
      "display_name": "Jane Smith"
    },
    "history_id": "4627",
    "id": "19a78826962bac81",
    "labels": ["UNREAD", "IMPORTANT", "INBOX"],
    "subject": "Question about pricing",
    "thread_id": "19a78826962bac81",
    "to": [
      { "address": "you@gmail.com" }
    ]
  },
  "userUuid": null,
  "namespaceId": null,
  "userIdentifier": null,
  "userAggregationId": null,
  "uniqueKey": "a1b2c3d4e5f6...",
  "integrationUuid": "019b08bf-5f2a-7bfb-ae75-59ab7ce5a18d"
}
Jobs listen for specific event types and use the properties data to perform their actions.
4. Build an Email Auto-Reply Chain
There are two ways to build automations in OAIZ:
- Manual — Create jobs and chains yourself using the Canvas and Jobs views
- AI-Generated — Describe what you want in the Chat, and OAIZ builds the chain for you
In this tutorial, we'll use the Chat to automatically generate a chain that replies to incoming emails.
Step 1: Open the Chat
Go to the Canvas view. You'll see the Chat panel on the right side. Type @ to mention an event—this gives the AI context about what data to work with.
Click to enlarge
Step 2: Select an Event
Choose Events from the mention menu, then select one of your Gmail events. This tells OAIZ what kind of data your automation will process.
Click to enlarge
Step 3: Describe Your Automation
Write a message describing what you want to automate. For example:
Based on emails I receive such as @e:gmail/email-received, please generate a suitable reply and send it back to the sender using the gmail integration
Click to enlarge
Press Enter to send. OAIZ will analyze your request and generate a chain with the necessary jobs—one to draft the reply using AI, and another to send it via Gmail.
Step 4: Apply the Generated Chain
After a moment, OAIZ responds with a Chain Details card showing the generated chain name and description. Click Apply Config to add the chain to your Canvas.
Click to enlarge
The chain is now displayed on the Canvas as a Draft. You can see the flow from the input event through each job.
Click to enlarge
Understanding the Canvas
The Canvas displays your automation as a visual flow. A chain is a workflow made up of connected nodes. There are two types of nodes:
Event Nodes (purple) — Represent data flowing through the system. The first event node is the trigger (what starts the chain), and subsequent event nodes are outputs from jobs that can trigger the next job in the sequence.
Job Nodes (white cards) — The actual work units. Each job listens for a specific event, performs an action, and outputs a new event. Jobs can have different action types:
- AI Agent - Simple — Send a prompt to an LLM and get a structured response. Great for classification, extraction, or generating content.
- AI Agent - ReACT — An autonomous agent that can reason, use tools, and take multiple steps to complete complex tasks.
- Integration Actions — Perform actions via connected services (send email, create issue, post message, etc.). Each integration has its own set of available actions.
- Webhook — Send HTTP requests to external URLs, allowing you to integrate with any API.
When a job completes, it posts an output event back to the system. The next job in the chain listens for that event and executes - or a completely different chain can pick it up!
5. Review and Activate
The generated chain appears on the Canvas as a draft. Before activating it, you should review each job to understand what it does and verify the configuration is correct.
Reviewing the Generate Job
Click on the first job (Draft Reply Email) to open its configuration. You'll see three main sections:
Job Details — The job name, description, status, and what event triggers it (in this case, e:gmail/email-received):
Click to enlarge
Action - What it does — This job uses an AI Agent - Simple action type. You can see the LLM model selection and the query prompt that tells the AI how to generate the reply. Notice how it uses {{ properties.from.display_name }} and other property references to access the input event data:
Click to enlarge
When editing jobs, type @ to see available properties. You can use Input properties from the triggering event, or create custom properties that the LLM can fill out for you based on your instructions:
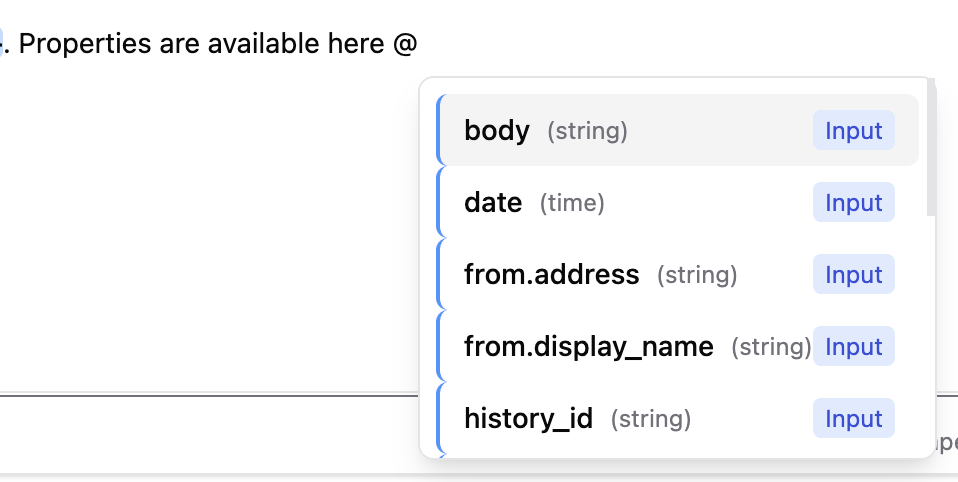

You can also reference Knowledge documents—a centralized way to attach business context, guidelines, or reference material that your AI agents can use when processing events. Learn more in the Knowledge view documentation.
Output Event — Defines what data this job outputs for the next job to consume. The AI generates fields like replyBody, replySubject, and recipientAddress, which are mapped to output properties:
Click to enlarge
Beta Notice
Our AI chat is still in Beta, so it's wise to quickly review a job after generation.
In our example, we see that the AI will try to extract the recipientAddress and put it in the custom property {{action.recipientAddress}}, but this is unnecessary as it is already passed through using {{properties.from.address}}.
This won't break the functionality of this job or chain, but is redundant.
Reviewing the Send Job
Click on the second job (Send Reply Email) to see how it's configured. This job listens for the output event from the Generate job:
Click to enlarge
The action uses the Gmail integration to send emails. Notice how it references properties from the previous job's output (like {{ properties.email_body }} for the email body):
Click to enlarge
The Actions Toolbar
The Actions toolbar at the top of the Canvas shows the chain name, status, and available actions:
Click to enlarge
Save and Activate
You can modify any job by clicking on it. When you're happy with the chain:
- Click Update Chain (or Save Chain for new drafts) to save your changes
- Click Edit details to open the chain settings modal
- Change the Status from Draft to Live
Click to enlarge
The available chain statuses are:
- AI Draft — Reserved for AI-generated chains. Not active and hidden from most views.
- Draft — Chain is saved but not active. Can still run with test tools.
- Paused — Chain is validated but paused. Won't run on incoming events, but can be tested.
- Live — Chain is active and running on incoming events.
Once live, your chain will automatically run when matching events arrive.
6. Try It!
Now let's see the chain in action. Send an email to your connected Gmail inbox:
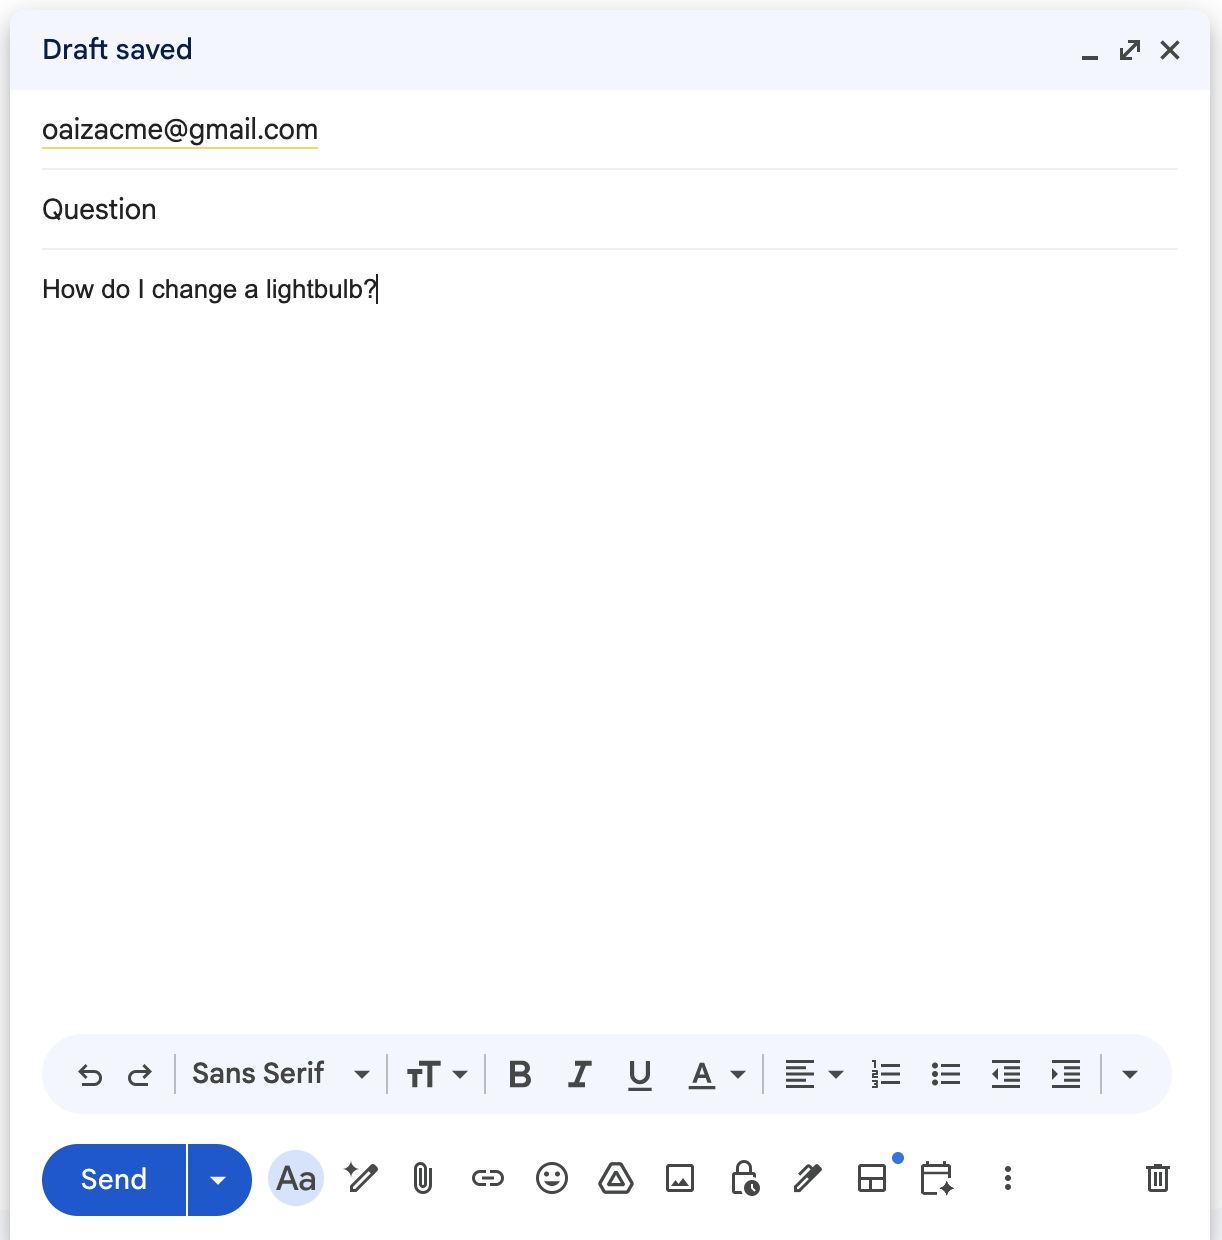
Wait a few moments for OAIZ to process the incoming email event. The chain will trigger automatically, generate a reply using AI, and send it back to you:
Click to enlarge
Notice how the AI correctly handled our instructions:
- Appended "Re:" to the email subject to indicate it's a reply
- Inferred your name as "Daniel" from your email address, even though it wasn't stated anywhere in the original message
7. Logs & Results
After your chain runs, OAIZ provides two ways to inspect what happened: the Events view and the Logs view.
Events View
Navigate to the Events view to see all events flowing through your system. You'll see the original e:gmail/email-received event that triggered your chain, plus the intermediate event published by the first job:
Click to enlarge
Click on an event to see its full details, including all properties. Here's the output event from our AI job, showing the generated reply body, subject, and recipient address:
Click to enlarge
Logs View
The Logs view shows execution history for your jobs. You can filter by job, chain, status, and date range. Each row represents a single job execution:
Click to enlarge
Click on a log entry to see the full execution details, including the input event, execution timeline, and output. This is invaluable for debugging when things don't work as expected:
Click to enlarge
8. Testing & Troubleshooting
Testing Tools
Before going live, you can test your chain using the built-in Testing Tools. In the Canvas Actions area, click Test to open the test panel:
- Use Latest Event — Automatically select the most recent event matching your chain's input type
- Select Existing Event — Choose any event from your event history
- Generate Test Event — Create a custom event with mock data
Configure your test input by editing the event JSON directly, or toggle Use Latest Input Event to automatically fetch the most recent matching event:
Click to enlarge
Click Execute Test to run the chain. The Results tab shows execution logs for each job, including what the AI generated and the output event properties:
Click to enlarge
Test runs simulate the chain execution without publishing events to the live event stream—perfect for debugging.
Common Pitfalls
The Chat-based generation works well most of the time (~90%), but occasionally you'll need to make adjustments. The most common issue is misaligned properties between job inputs and outputs.
For example, if Job 1 outputs {{ properties.reply }} but Job 2 expects {{ properties.message }}, the data won't flow correctly. Check the Logs to see exactly what each job received and produced, then edit the job configuration to fix the property names.